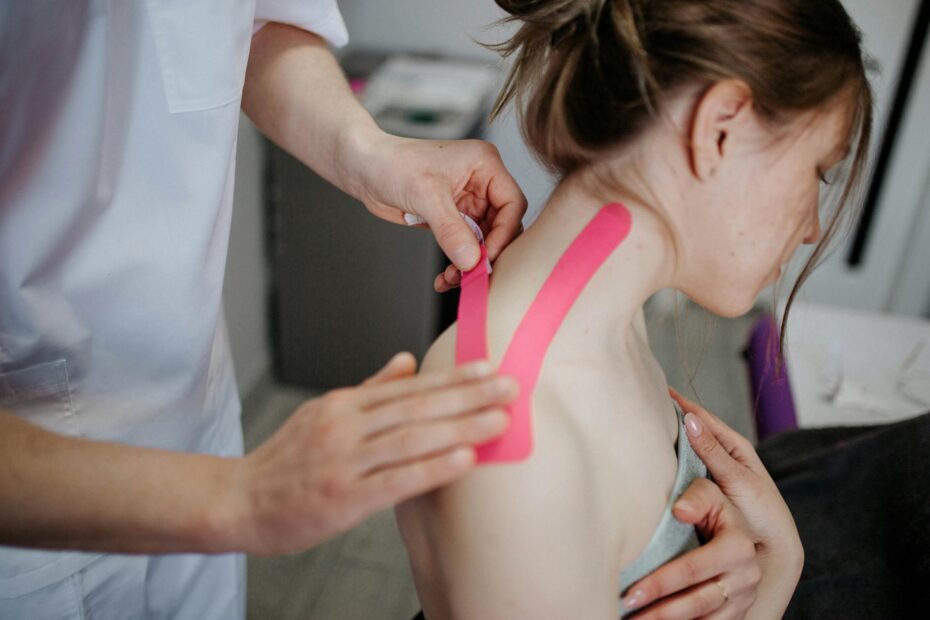
As we enter our 40s, a surprising number of individuals begin to experience joint discomfort, manifesting as stiff knees, tight hips, sore lower backs, or achy shoulders. This shift can often be attributed to a combination of factors, including prolonged sitting, repetitive motions, past injuries, added weight, or the early onset of osteoarthritis. What could these signs mean for your overall health and mobility?
Health agencies like the CDC note that staying active — rather than resting completely — is one of the most important ways to reduce arthritis pain, improve function, and delay disability.
That is where gentle, joint-friendly yoga comes in. Done correctly, yoga builds strength around the joints, improves flexibility, supports balance and posture, and helps you move with less pain and more confidence. The Arthritis Foundation and other expert groups report that yoga can reduce pain and stiffness and improve mood and quality of life in people with arthritis.
Below are 14 carefully chosen yoga moves designed for adults over 40 who want less joint pain and more freedom of movement.
Evidence-Based Benefits Of Yoga For Joint Pain
Research on yoga for osteoarthritis — especially knee osteoarthritis — is growing. Meta-analyses and randomized trials show that regular yoga practice can reduce pain and stiffness and improve physical function in people with knee OA.
A 2025 randomized trial found that yoga was non-inferior to standard strengthening exercises for improving knee pain over 12 weeks, suggesting it can be used as an alternative or complement to traditional exercise plans.
At the same time, guidelines from the American College of Rheumatology and the Arthritis Foundation only conditionally recommend yoga for knee OA, mainly because the evidence, while positive, is still limited compared with more studied options like tai chi.
In simple terms:
- Yoga is low-impact and generally safe when modified.
- It can be a powerful tool for pain relief and function.
- It should be one part of a broader activity plan that includes walking, strength training, and daily movement.
How to Use These 14 Poses Safely After 40
Before we get into the specific moves, a few safety notes:
- Check with your doctor if you have arthritis, previous joint surgery, or significant pain.
- Move slowly and stay under your pain threshold. Mild stretch is ok; sharp pain is not.
- Use props (chair, wall, cushions, blocks) generously. They are not cheating; they are smart.
- Practice on a non-slip surface and, if balance is an issue, stay close to a wall.
Now, let’s walk through the 14 poses, grouped by focus area.
A. Warm-Up and Reset Poses
1. Cat–Cow (Spinal Mobilizer)
Cat–Cow gently lubricates the spinal joints and takes the back through flexion and extension. This is ideal if you wake up stiff or sit a lot.
Start on hands and knees, shoulders over wrists and hips over knees. As you inhale, gently arch your back and lift your chest (Cow). As you exhale, round your spine and draw your navel toward your spine (Cat). Move slowly 8–10 times.Arthritis Foundation
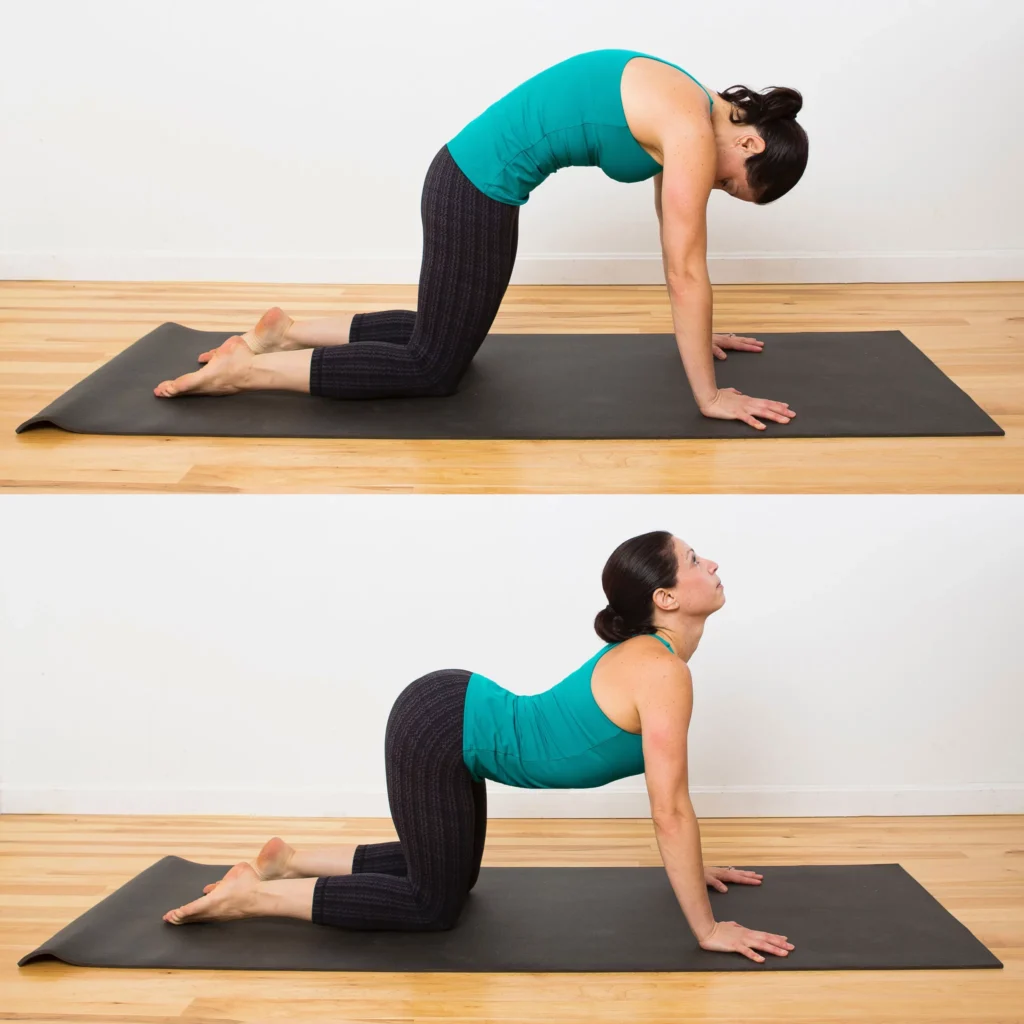
Why it helps after 40:
- Improves spinal mobility and posture.
- Reduces tension in mid-back and neck that can affect shoulder and hip alignment.
2. Child’s Pose (Restorative Hip and Back Release)
Child’s Pose is a simple, floor-based posture that gently decompresses the lower back and relaxes the hips.
From hands and knees, sink your hips back toward your heels and stretch your arms forward. If knees are sensitive, widen them or place a pillow between calves and thighs.
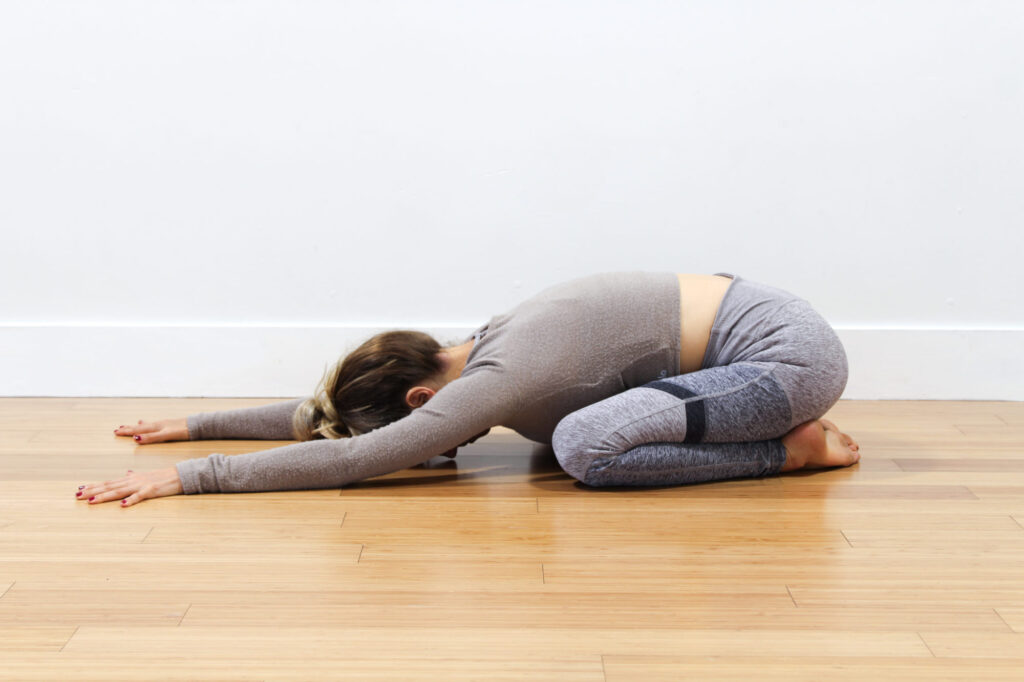
Why it helps:
- Takes pressure off the lumbar spine.
- Offers gentle stretch for knees and hips without loading them.
3. Supported Savasana (Relaxed Realignment)
Lie on your back with a pillow under your knees and maybe a folded towel under your head. Relax your arms by your sides.
This is less “exercise pose” and more nervous-system reset. Chronic joint pain is strongly influenced by stress and tension; deep relaxation can dial pain down over time.
Why it helps:
- Encourages muscles around the joints to release gripping.
- Supports better body awareness and breathing patterns that help with pain management.
B. Hip And Lower Back Friendly Poses
4. Reclined Figure-Four (Hip Opener)
Lie on your back with knees bent. Cross your right ankle over your left thigh (like a “4”). If comfortable, lift the left foot and hold behind the thigh.
You should feel a stretch in the right outer hip and glute, not in the knee. If there’s knee pain, back off or support the ankle more.
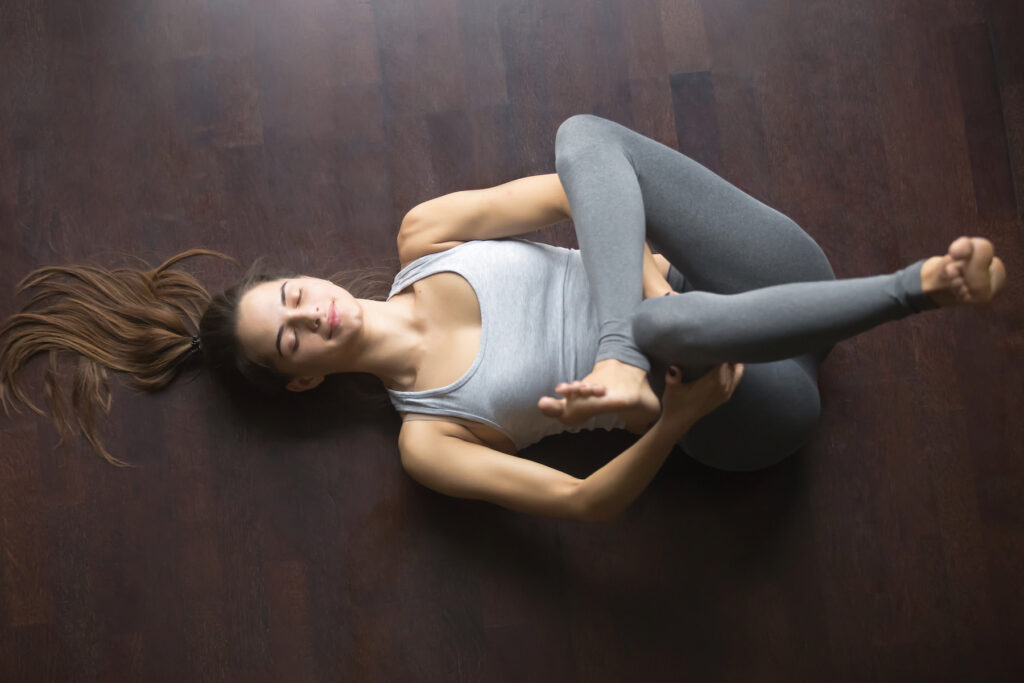
Why it helps after 40:
- Tight hip muscles can pull on the lower back and knees.
- This pose eases hip and piriformis tension, reducing referred pain.
5. Low Lunge with Support
From hands and knees, step your right foot between your hands and lower your left knee to the floor (use padding). Place hands on blocks or on your front thigh.
Gently sink the hips forward until you feel a stretch in the front of the left hip. Keep the core slightly engaged and chest lifted.
Why it helps:
- Stretches hip flexors, which get tight from long hours of sitting.
- Reduces pressure on the lower back and can support better hip alignment.
6. Bridge Pose (Supported if Needed)
Lie on your back with knees bent, feet hip-width apart. Press feet into the floor and slowly lift hips. For joint pain or after 40, you can place a block or cushion under the sacrum and rest on it.
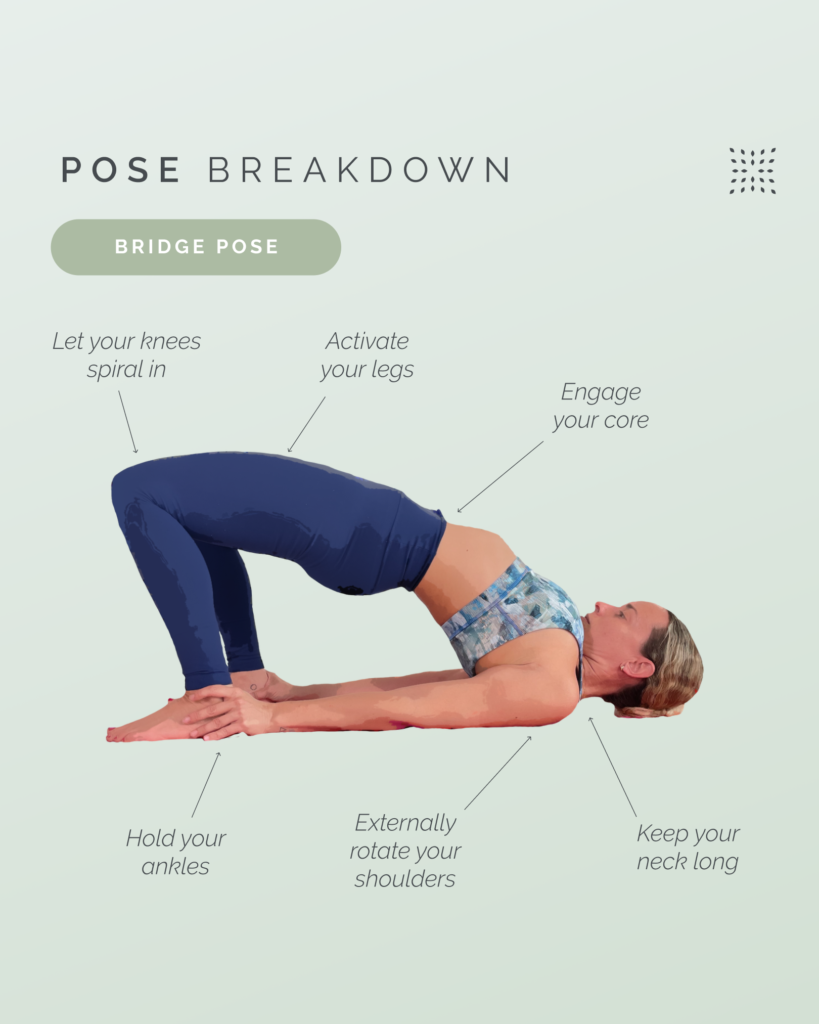
Why it helps:
- Strengthens glutes and hamstrings, key muscles that support knees and hips.
- When supported, offers gentle spinal extension and opens the front body without strain.
Strengthening the muscle groups around painful joints is a core strategy in arthritis management and can reduce pain and stiffness.
C. Knee-Friendly Strength and Stability Poses
7. Mountain Pose (Posture Re-Training)
Stand with feet hip-width apart, knees soft (not locked), and weight evenly distributed. Lengthen through the spine, draw shoulder blades slightly back and down, and engage the core gently.
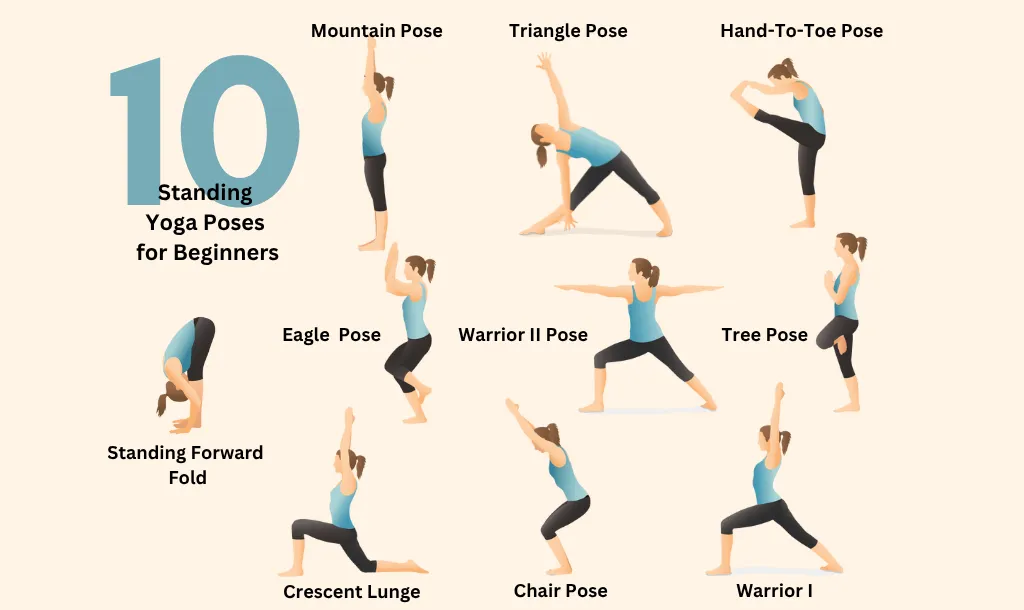
Why it helps after 40:
- Creates awareness of joint stack (ankles, knees, hips, shoulders in line).
- Good standing posture can reduce wear and tear on knees and hips.
8. Chair Pose (Short and Supported)
From Mountain Pose, bend your knees slightly as if sitting back into a high stool. Keep weight more in the heels, chest lifted, and arms forward or at your hips.
If knees are sensitive, keep the bend shallow and hold onto the back of a chair.
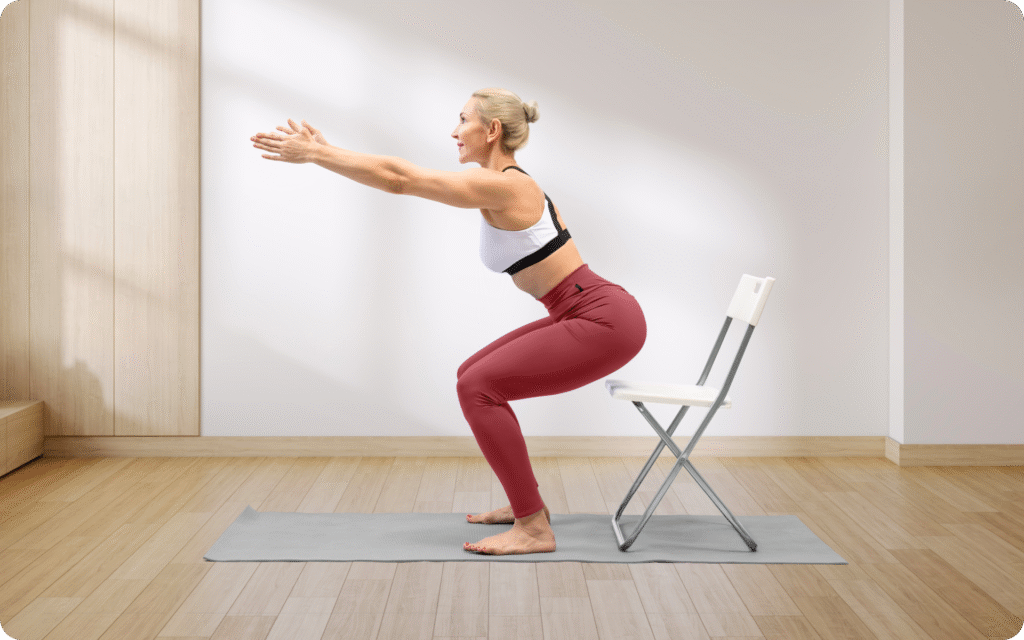
Why it helps:
- Builds strength in quadriceps and glutes, which helps offload knee joints.
- When done carefully, supports better movement patterns in daily sit-to-stand activities.
9. Supported Warrior II (Short Stance)
Take a shorter stance than in a traditional Warrior II to keep strain low. Turn your right toes out, bend your right knee slightly, and keep your left leg straight. Rest one hand on a chair or wall.
Why it helps:
- Strengthens legs and hips while also training side-to-side stability.
- Encourages awareness of knee alignment over the ankle, which is crucial for joint safety.
10. Tree Pose with Wall Support
Stand side-on to a wall or with a chair in front of you. Shift weight to your left foot, place your right toes on the floor with the heel resting against your left ankle, or place the foot on the calf. Lightly hold the wall or chair.
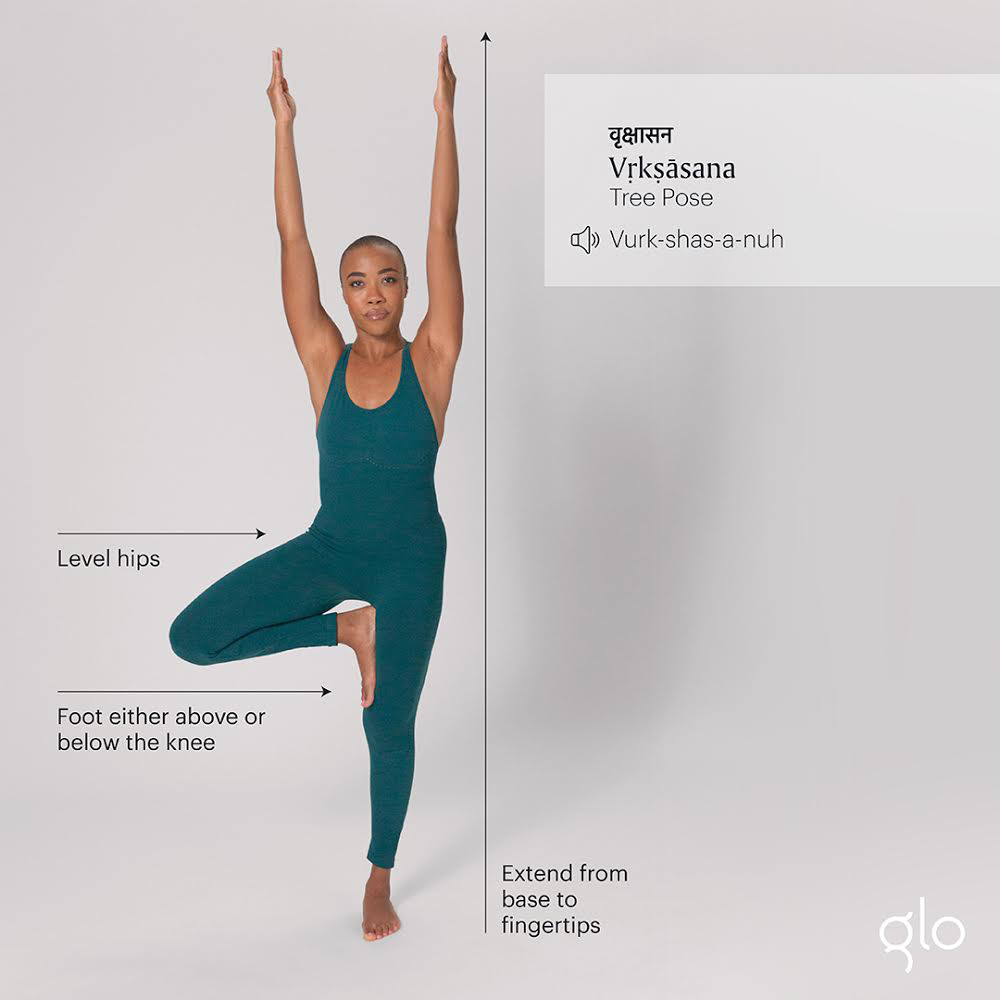
Why it helps after 40:
- Trains single-leg balance, which is vital for fall prevention and joint protection.
- Builds small stabilizing muscles around the ankle, knee, and hip.
Balance and flexibility work are recommended in older adults to help maintain functional ability and reduce fall risk.
D. Upper-Body and Whole-Body Joint Support
11. Tabletop with Gentle Weight Bearing
Come onto hands and knees with hands under shoulders and knees under hips. Spread your fingers and press evenly through palms.
If wrists are sensitive, place your forearms on blocks or fold the mat under the heels of the hands.
Why it helps:
- Introduces gentle load into shoulders, wrists, and elbows.
- Strengthens upper-body muscles that support everyday tasks (pushing, lifting, reaching).
12. Thread the Needle (Shoulder & Upper Back Release)
From Tabletop, slide your right arm under your left arm, lowering your right shoulder and side of the head to the mat. Left hand can stay on the floor or reach toward the front of the mat.
Why it helps:
- Releases tension in upper back and shoulders, which can affect neck and even elbow or wrist comfort.
- Gentle spinal rotation also supports healthy thoracic mobility.
13. Downward-Facing Dog (Modified)
From Tabletop, walk your hands slightly forward, tuck your toes, and lift your hips. Keep knees generously bent and heels lifted so there’s no strain in hamstrings or low back.
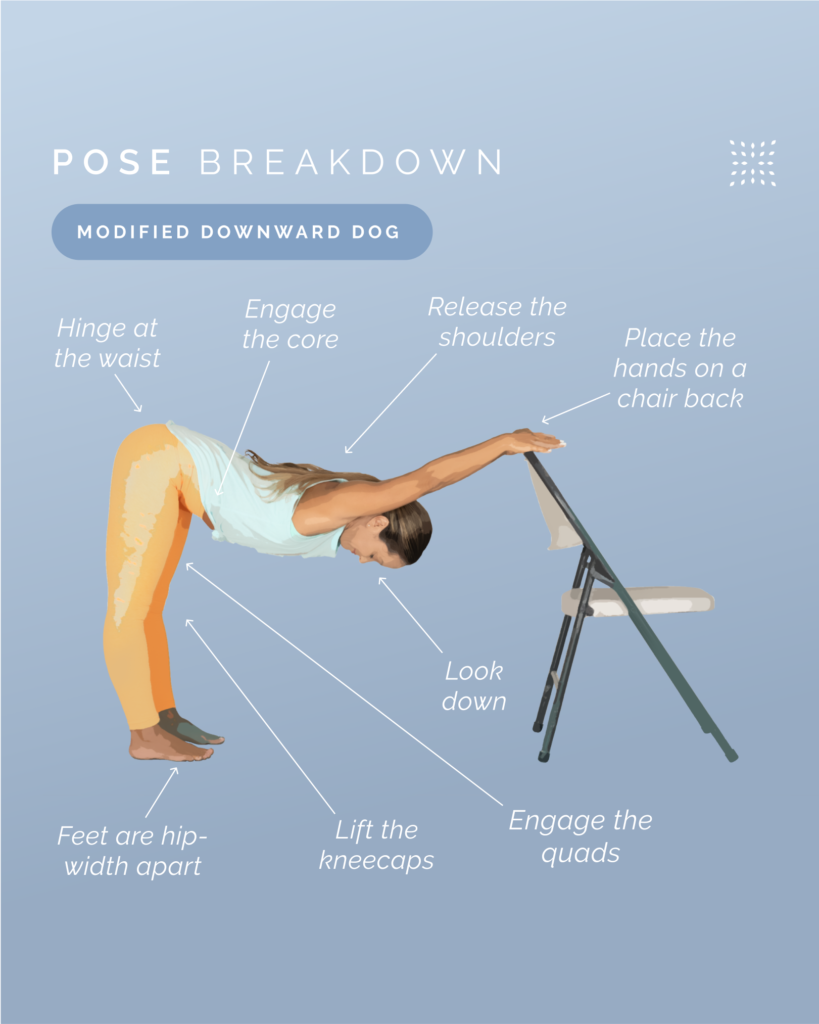
If this is too intense, practice Half Dog at the wall: hands on the wall, walk feet back until your body forms an “L” shape.
Why it helps:
- Stretches calves, hamstrings, and back while strengthening shoulders and arms.
- Improves overall chain mobility, which helps joints share load more evenly.
14. Legs-Up-the-Wall (Restorative Inversion)
Sit sideways near a wall, then swing your legs up the wall as you lie back. Hips can be close or a bit away. Support the head and lower back with a towel or cushion if needed.
Why it helps after 40:
- Promotes gentle drainage and circulation in the legs, helpful if you stand or sit a lot.
- Provides a break from gravity for ankle, knee, and hip joints, often easing a sense of heaviness or ache.
How Often Should You Practice for Joint Relief?
Most physical activity guidelines suggest at least 150 minutes of moderate-intensity activity per week, plus muscle-strengthening activity on two or more days.
For joint pain relief specifically:
- Aim for 10–20 minutes of gentle yoga most days.
- Include a mix of mobility, stretching, and light strengthening.
- Expect gradual changes over 4–8 weeks, not overnight miracles.
Remember, the best routine is the one you can stick with — comfortably and consistently
FAQs
Can yoga really reduce joint pain after age 40?
Yes. Gentle yoga improves flexibility, strengthens supporting muscles, and boosts circulation around the joints. This reduces stiffness and pain over time.
Which yoga moves are best for beginners with joint pain?
Cat–Cow, Child’s Pose, Supported Bridge, and Legs-Up-the-Wall are ideal beginner-friendly poses that don’t strain sensitive joints.
How long should I hold each yoga pose for pain relief?
Hold each pose for u003cstrongu003e15–30 secondsu003c/strongu003e or 3–5 slow breaths. The focus should be on comfort, not pushing deeper into the stretch.